Whether via the HTTPS or MQTT protocols, it is possible for devices to upload historical values into ExoSense.
record
verb
/rəˈkôrd/
- For HTTPS, see Exosite Documentation - Exosite Documentation
- For MQTT, see Exosite Documentation - Exosite Documentation
For this walkthrough I’ll be using the murano-client python library’s CLI from ExoEdge to illustrate RECORDing data as opposed to WRITEing data (writing uses the timestamp of when Murano received the data).
Step One - Create Device
gdc -H mqtt://h2s7b7l7i7b000000.m2.exosite.io/ -u batch-record-1 mqtt activate
NRAd22Y0BiHtOAhhFDfryoLVZv7VBQPhMZHTCzwd
Step Two - Create Config for ExoSense
Then, in ExoSense, create a Simple Asset and create a temperature channel. Once complete, subscribe to get the object, then publish it back to Murano.
gdc -H mqtt://h2s7b7l7i7b000000.m2.exosite.io/ -k NRAd22Y0BiHtOAhhFDfryoLVZv7VBQPhMZHTCzwd mqtt subscribe
config_io.1544111292269000={"last_edited":"1544111291562","channels":{"000":{"description":"Temperature for illustrating batch recording and publishing.","display_name":"Temperature","properties":{"data_type":"TEMPERATURE","data_unit":"DEG_FAHRENHEIT","device_diagnostic":false,"max":null,"min":null,"precision":1},"protocol_config":{"app_specific_config":{},"application":null,"down_sample":"actual","input_raw":{},"interface":null,"report_on_change":false,"report_rate":60000,"sample_rate":60000}}}}
Copy/Paste the config object and publish it back.
gdc -H mqtt://h2s7b7l7i7b000000.m2.exosite.io/ -k NRAd22Y0BiHtOAhhFDfryoLVZv7VBQPhMZHTCzwd mqtt publish \$resource/config_io '{"last_edited":"1544110962659","channels":{"000":{"description":"The temperature in Fahrenheit.","display_name":"Temperature","properties":{"data_type":"TEMPERATURE","data_unit":"DEG_FAHRENHEIT","device_diagnostic":false,"max":null,"min":null,"precision":1},"protocol_config":{"app_specific_config":{},"application":null,"down_sample":"actual","input_raw":{},"interface":null,"report_on_change":false,"report_rate":600000,"sample_rate":600000}}}}'
Step Three - Publish Channel Data
for i in $(seq 1 10) ; do
    echo "{\"000\": $i}"
    sleep 1
done |  gdc -H mqtt://h2s7b7l7i7b000000.m2.exosite.io/ \
            -k NRAd22Y0BiHtOAhhFDfryoLVZv7VBQPhMZHTCzwd \
            mqtt \
            publish \
            \$resource/data_in -
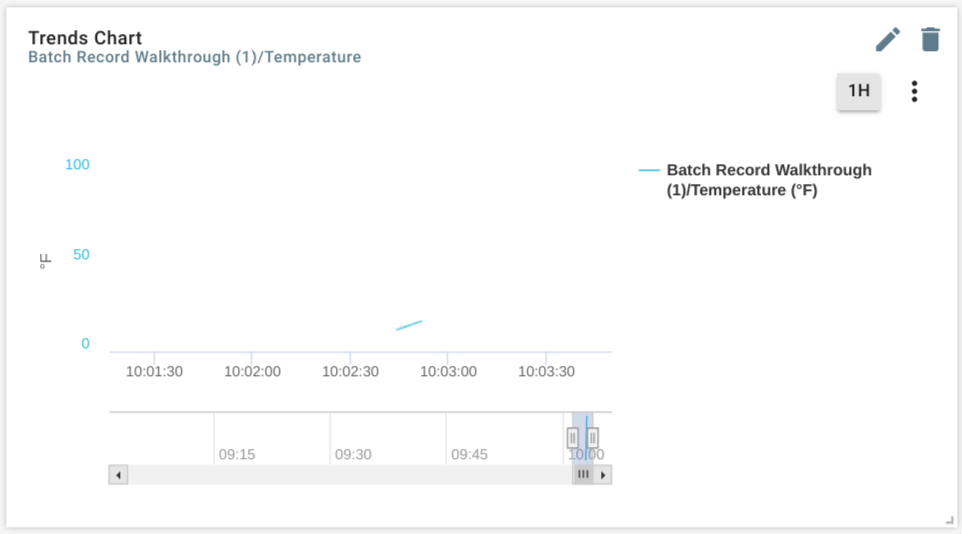
This creates the following on a Complex Line Chart
Step Four - Record Historical Data
gdc -H mqtt://h2s7b7l7i7b000000.m2.exosite.io/ \
-k NRAd22Y0BiHtOAhhFDfryoLVZv7VBQPhMZHTCzwd \
mqtt \
publish \
\$resource.batch \
'[
    {
        "timestamp":1544114925000000,
        "values": {
            "data_in": "{\"000\": 50.0}"
        }
    },
    {
        "timestamp":1544114924000000,
        "values": {
            "data_in": "{\"000\": 55.0}"
        }
    },
    {
        "timestamp":1544114923000000,
        "values": {
            "data_in": "{\"000\": 60.0}"
        }
    },
    {
        "timestamp":1544114922000000,
        "values": {
            "data_in": "{\"000\": 65.0}"
        }
    },
    {
        "timestamp":1544114921000000,
        "values": {
            "data_in": "{\"000\": 70.0}"
        }
    }
]'
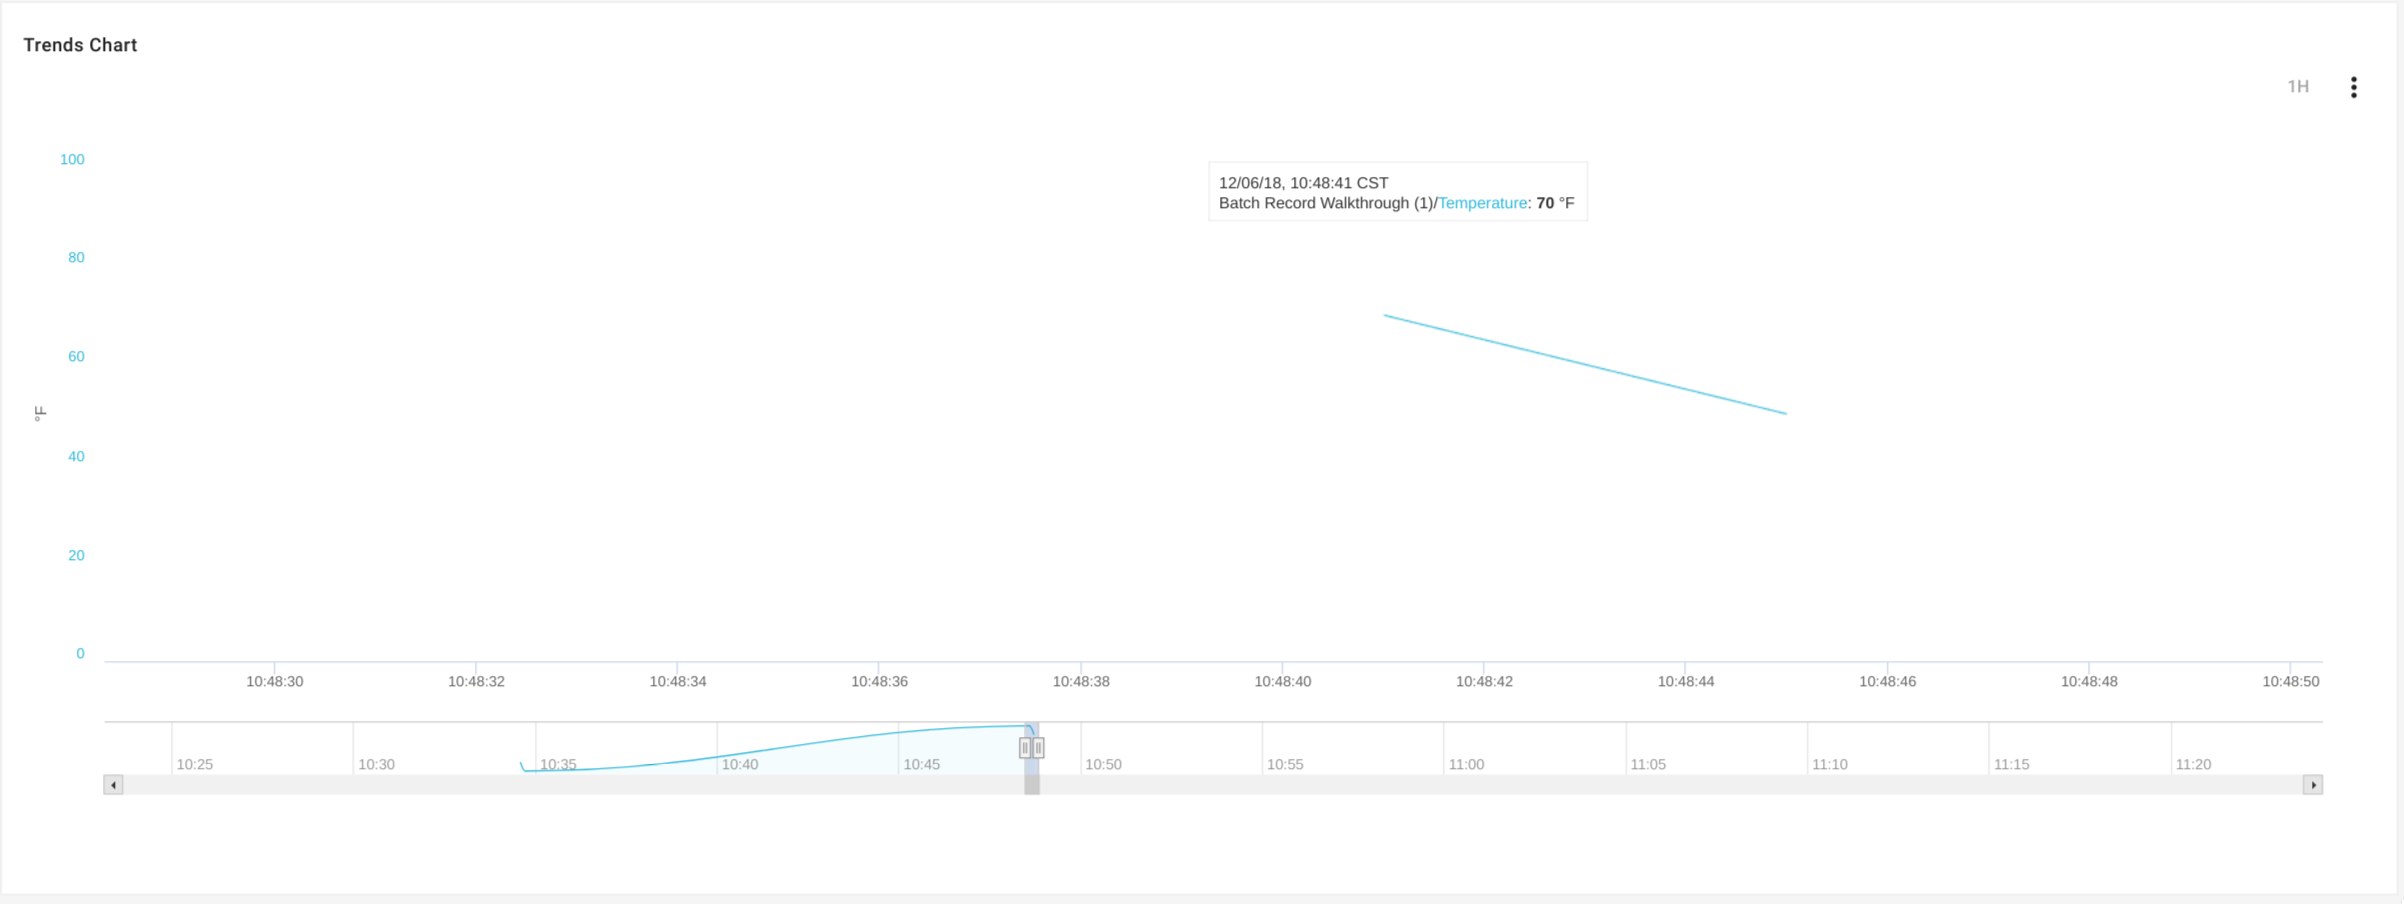
Zooming in on the line chart (after refreshing the dashboard) shows our datapoints:
Conclusion
The main takeaways are:
- Use microsecond timestamps.
- Adhere to the schema (above) for the publish payloads.